Tuesday, September 29, 2009

Taming the Beast

I can't believe I'm saying this already, but I think the machine quilting is...done!  It wasn't nearly as bad as I thought it'd be, once I got started.  Admittedly, my stitching looks like crap next to yours, but you know what?  For a first attempt (and with no Momisms to guide me) I think I'm doing pretty well! 

I started making the ladybug buttons last night, and I got maybe 2 to come out even remotely cute...most of them were just black and red blurs.  We'll see if I decide to keep going with that one.  There's a big open space with no quilting above the thumb, so I might need to figure something out for that. 

Anyways, without further ado, here are the latest:


The back, midway through.


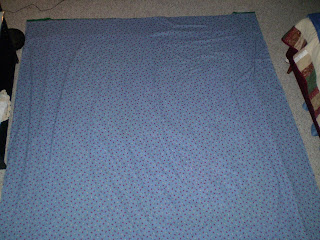
The back, done!  I outlined the hand, heart, and borders.  All things considered, it looks ok.  There are a few areas that could have been better, but I'm sure you'll advise me later on how to improve.  :-)  I'm proud to say though, that there's only one small strip that has any kind of double stitching across it, and most of this is continuous...like, just kept going around the corners, stuffing the quilt through the hole that seems so much bigger without half a quilt stuffed in it.  The borders were a piece of cake compared to the hand!


And, of course, the front all stitched up.  The pins are still in, as you can see.  I can see the stitching the most in the borders, but that could be just me.

Anyways, the next steps are whatever hand quilting I decide to do (I'm still not sure what I want to do yet), and the border. 

I've also started working on Grammom's bag...it's a fun spatial puzzle to figure out, especially the drawstring closures.  I'm thinking about putting some kind of "hook" on the corner of each compartment too, so she could put a little loop of yarn there to hold it while it's not part of the pattern, but so it'd be easy to grab when she's ready (as opposed to digging through to find the end of the skein). 

Anyway.  Bed time!  I can't believe how quickly this came together!  I thought I was going to be down to the wire, but it's really not so bad at all...but I gotta say, I really do have a deeper appreciation for all the quilts you've made me over the years! 

Saturday, September 26, 2009

Last Night's work

It was about 4 am before I went to bed, so I didn't get around to posting pictures...sorry.  :-)  I got a lot done last night though!  I got all the borders sewn on the front:


Then I got the back panels sewn (in two strips...I didn't relize you're technically not supposed to have the seam down the middle, to avoid wear.  Note to self):


Once all that was done, I cleared out some space in my living room:


Then laid things out to pin together:


The batting is thinner than I expected, but I think that's good.  It'll definitely work better for grammom's bag, but once I rolled the quilt up, it seemed like it would be heavy enough to keep some heat in, but not so heavy it'll be hot at any given point.  I think that it's intended to be a full-sized couch quilt lol.


Let it never be said that I didn't use my textbooks after college.

It turns out that the backing, while I thought I bought more than enough, shrank a lot in the wash.  It fits with the front, sort of.  I think I'm going to end up putting a layer of the yellow rose stuff around the outside to make sure it's big enough to cover everything.  Right now, 3/4 of the quilt is pinned though, so I think I'm going to just measure things and keep it pinned.  It's sort of easier to deal with when it's rolled nicely anyways. 


You can see the pins, sort of.

Anyways, that's the latest.  It won't fit at all in the sewing room, and it barely fits in my bedroom.  I had to move furniture to lay it out in the living room (which was the best place anyways, since the floors are hardwood there...no kitty hair, and no chance of accidentally pinning the quilt to the floor). 

first glimpse

here's the first attempt at the bag for grammom. nothing spectacular yet, but it has potential. the wash is done though. so I'm gonna put the backing for your quilt together.

Thursday, September 24, 2009

Keeping Mum

ARGH!!!!  I talked to you today and told you about my design for Grammom's bag...and I felt SOOOO bad because I couldn't reassure you that I'm making you something way better!!  I should have sent you a decoy pair of happy pants or something to throw you off the scent.  I feel so terrible!  I hope you've forgiven me by the time you're reading this though...I hope it's worth it! 

KEEPING THIS A SECRET FROM YOU IS DRIVING ME CRAZY!!!!!!!!!!!!!  ARRRRRGGGGHHHH!!! 

Love you lots.  :0D

Monday, September 21, 2009

Quick Update

The more I looked at the rose fabric, the less I liked it...it didn't seem...whimsical?  enough somehow.  So I found some fun stuff that's a light blue background with ladybugs and little flowers on it instead.  I also picked up some pink stuff for the edging and (drumroll please) I committed to a batting!  It's the queen-size polyester low-loft (1/4 inch I think?) stuff that's Joann's preferred brand.  I also snuck a peak at some "how to quilt big projects" books and picked up some basting pins (now I get it!).  I might even try doing some of the "stitching in the ditch" (I think that means sewing right along the seams...right?) by machine.  Thinking about stitching around the edges of the hand and fingers so it shows up on the back of the quilt too. 

That said, this week is going to be a crazy week.  It's college application time, so I'm going to be helping Mai with hers for the next few Tuesday/Thursdays.  Monday/Wednesday are class nights, Friday is date/relax night, and Saturday we're heading up to VT for James' birthday.  If I get time to put the border strips on, I'll be happy.  If not, there's always next week sometime. 

Also, I started scheming about what to do for other people for Christmas, once I've got your project tamed.  I'm thinking about making a yarn bag for grammom...wish I could get your help on this one too, but I'm not sure I can ask you about it without either a) giving away your gift or b) making you think I'm NOT doing anything that special for you this year. So I think I'm on my own for this too.  I'm going to doodle some ideas later and post them for posterity.  I'm thinking an over-the-shoulder bag with 3 or 4 compartments inside for separate skeins of yarn, with little drawstring closures at the top of each to keep the yarn inside.  There'd be a little skinny pocket on the side for spare needles, and a 4th or 5th inside pocket along the width of the bag to keep her current project in.  That way, she could easily bring a small project with her to doctors appointments, etc.  I think I might be able to use some of the extra batting I'll have to make it more sturdy.  I'm not sure if I can use the same fabric though, since it might not be sturdy enough for everyday use.  Maybe it will, I don't know.  I'm not sure what pattern I'd do on the outside of the bag, but if I could use fabrics from your quilt, that would be good.  Maybe I'll just do hearts in blue, the same pattern that I did your heart in, and then green around the heart?  Or the reverse?  I dunno.  Anyways, new project in the pipeline once this is further done. 

Thursday, September 17, 2009

Better Frames


There we go, better resolution.  First layer is all cut and sewn into strips...I bought WAY too much fabric for this, but that's ok...I have stuff to play with now.  Unfortunately, it's all in 2 1/2, 4 1/2, and 8 1/2 strips.  Oh well.  Next.


 Playing around with the other fabrics to imagine what it's going to look like.  Not bad, not bad...but...


drumroll please....


....


....


....


Boom!  There it is!  I ended up swapping the light blue/green, and I think I like it way better this way.  It looks more like a picture frame, I think.  I wish you could get a sense of how big this thing is, but for reference, that's the foot of my full-sized bed right there.  That bookshelf is also about 4 feet wide I think.

But anyways, this is so cool!  This is literally all there is to the front of this quilt!!  (Minus the binding, of course, but that's coming later.)  I wish I could email you this picture right now, I'm so stoked!!!

framed!

I'll have bigger, more detailed pics up soon, but here's the latest!

Wednesday, September 16, 2009

backing materials

I got these yesterday...gonna do a frame of the blue around the yellow, since it's the yellow rose of texas...so much subtlety in this thing! :)

Sunday, September 13, 2009

The end of chaos

It's done!  The complicated (visually) part is done!  It's after 3 am, so I'm trying to remind myself that this'll look better when I've slept on it...some of the vertices are disasters, and it took a lot more ripping/resewing of some seams than I wanted, but here it is!

 
The middle two fingers look better than I thought they would (yay!), and working from the center out wasn't as bad as I anticipated...thank God for that.  I need to reiron the back so it lies flatter, then I can start on the borders.  That'll probably be sometime this week though, because tomorrow I need to get some homework done.  
At some point I need to make the ladybug buttons too...that'll be an adventure I'm sure.  :-)  
It's bedtime...long past it.  I'm so excited to show this to you though...I wish I could send you this picture right now.  Oh well...only a couple more months.  Gnight!

Saturday, September 12, 2009

The end of an era

No more triangles, squares, parallelograms, or funky fabrics.  That's right, folks, the middle section is all cut out and, mostly, sewn!  It's still in a few major chunks, but it looks like it's supposed to!

 
First, here are all the rest of the pieces cut out.  That bottom left (ok, top left in this picture) square was the last piece to be cut.  It took me a few minutes to decide what fabric should get that honor, so I went with one I haven't used as much.  Man, I have a lot of fabric left over.  
Drum roll please.....
......
......
......

 
Here it is!!!!!!  I can't believe it's already at this point!!  If I had some spare time, I might even be able to get this done for your birthday...but then I wouldn't be able to see you open it, so it's SO worth it to make this a Christmas gift.  
Anyway, I digress.  
The chunks are the same as the last post, plus a few more between the thumb and forefinger.  I am TERRIFIED to start sewing this all into one big chunk...I need to work from the center out to get it done right.  I'm still debating embroidering the middle two fingers, too...they look great in the picture and they actually look pretty ok in person, but I'm not sure.  I guess the doubt should say something...I'll let them be.  
It's 10 pm on a Saturday, Nick's in Boston having a business meeting all night, so I'm gonna keep going.  
I'm so psyched it's coming along!!!!  I want to call you SO BAD!!!!!!! :-) 

Friday, September 11, 2009

Sewing Lines


These are the lines that I still need to sew.  Should get some work done tomorrow.

Thursday, September 10, 2009

Homework

Ahh, the inevitable has happened...I just took a look at my impeding homework due for my classes...yikes.  I guess progress is going to slow down a bit for a while now.  Hopefully I can get the rest of the fill at least cut out this weekend, maybe even sewn.  Probably won't have a chance to do much before Saturday though...*sigh*.  I miss it already lol. 

Wednesday, September 9, 2009

All Boxed In


Got the bottom two corners done, so now 3 of 4 are sewn


All 4 corners are cut out!  Still got some pieces to cut for the middle though.  :-)  It's after midnight, so I'm giving up for the night.  I called you today, and it was all I could do not to tell you about this!!!  I'm dying here!!!! :-D

Tuesday, September 8, 2009

Playing with Colors


Still trying to figure out what to do for the binding.  I played with some colors in Paint, and this one intrigues me.  I think maybe a slightly less harsh shade of pink might tie things in nicely.  I'm thinking maybe that lighter blue would work well for the backing too. 

Monday, September 7, 2009

Progress!


Joann is a dangerous place.  This is my array of greens...just the greens.  Every time I go into that store (one of the three between work, home, and Nick's), I end up "accidentally" wandering into the fat quarters section.  I'm a big fan.  I like being able to have so many different patterns in the same quilt. 

Moving on.


Here's today's layout.  Grisgris is deeply enthralled.

 
Same layout, different angle.  

 
Tada!  The thumb isn't attached, and the greens are in 3 major chunks right now, but here's the gist of it!  The stuff on the right is the fabric I got to do the borders.  It's going to be 2 inches of the light blue, 8 inches of the green, and 4 inches of the darker blue.  Haven't figured out what to do for the edging or the backing yet.  Ideas?  :-P  

embroidery

got the stabilizer, cut it, pinned it to the fabric, set up the threads and machine...then chickened out at the last second. I can't risk it. I'll hand quilt it for emphasis, but I just can't risk a snag at this point. sigh.

batting!

I'm at joann's, and batting is 40% off! too bad I have no idea what I'm doing...oh, and the prepackaged stuff comes in 81x96 inches...your quilt is 82x88. one inch off! argh! guess I'll have to come back for this stuff later.

Friday, September 4, 2009

Nightly recap


The evening started out with the intrafinger region filled in nicely.


Suddenly, signs of life!  This is slightly redundant of the last post, just with better resolution.


The difference here, is that right edge is all sewn!  The vertices came out fairly well, and it's really starting to look like a quilt now (or at least a big rectangular thing anyways).  Still haven't done anything about the middle two fingers...didn't get a chance to get stabilizer today.  Maybe tomorrow.  It's a long weekend, so I should have some time to get some more done before going back to work on Tuesday. 

I'm pretty excited at how it's coming together!  All this stuff looked semi-ok in my head, but I really like how it looks in real life.  I'm really enjoying mixing up the fabrics and playing with lights/darks to keep things interesting.  Maybe someday I'll settle down and make a quilt with only a few fabrics...for now, I'll keep Pollacking it!  :0D

Thursday, September 3, 2009

signs of life!!

I wish I could send this picture to you!!! it's so cool to see this thing have a border, even if it's only one side and one layer (of 4 total). the middle is all sewn, while the right side is still in pieces. time to remedy that.

Email Exchange

The wife of one of the guys I work with (Kathy, wife of Brian) is an avid quilter and has graciously offered her help while I'm stumbling through trying to get this thing done.  She emailed me the following:

Hi Kat,
  I thought I posted a comment to you on your blogger.com site but I can’t see it so I’m going to send it to you again.  If you did find my comments, then ignore the first part of this message and skip to the part where I respond to your questions (if you’d like!).

  OMG!!  I think your quilt is fantastic!!  I am so impressed with your original design – that was a big step!!  And I think it’s great!  Your Mom is going to be SO impressed!!  I also love the way you are playing with different textures.  I personally love a lot of variety in my quilts and texture is a great way to provide it.  I’m assuming the quilt will be more of a wall hanging so the combo of fleece and cotton won’t be that big a deal.  If it was a bed/lap quilt that would get washed a million times, then the cotton would shrink (that’s why you wash the fabric before you cut – so that it shrinks and gets out any color that may bleed in future washings) and the fleece would not shrink and there would be puckering.  But your Mom can probably figure out how to clean it.  

  I also love the way you are laying out the quilt and playing with color.  I think most quilters would lay out the entire quilt (that is, decide on all colors and shapes) before they sew but that is a personal decision.  The more contrast you have (either using a much darker but same color background versus a completely different color in the background) will make your hand stand out even more.  Outlining the hand with embroidery will also help but, in and of itself, won’t make it as distinct.

  Once you have all (or most of) the pieces cut out, we usually try to sew pieces that go along rows and/or squares (i.e., straight lines of sewing).  For instance, looking at your paper design, on your fingers there are heavier black lines that make up a rectangle.  Try to sew as many straight seams within the rectangle and then sew rectangles together to make rows and then sew entire rows together.  That probably doesn’t make any sense.  I usually have to wave my hands before I make sense.  Anyway, the idea is to avoid non-90 degree angled intersections – they are best done by hand or there’s something called “paper piecing” that would also increase accuracy.

  When I looked at your background, I had trouble coming up with rows.  You can use the techniques I mentions above or you could just modify your shapes so that they fall within  rows and it will be easier to assemble……


Questions I would ask my mother:

1.    Don’t worry about the washing.  As I said, it helps to wash out any extra dye and shrinks the fabric.  Some people cut the raw edges with “pinking (sp?)” shears (you know the zig-zag scissors) so they don’t tangle but I never seem to get around to it.
2.    Quadrilaterals – I think I saw a few in there already, but, if you mean trapezoids specifically (I had to check Bri on my terminology here!), I cut a strip with the correct width and then cut two ends at 45 degrees.  (Most quilting rulers are clear and mark 45 and 30 degrees to make it easier.  You can also get some cardboard (cereal box) and measure the shape onto it, cut it out, and use it as a template.  Don’t forget to add the ¼ inch seam allowance!!)
3.    The flying geese – If you are sewing small squares onto bigger squares at the corners, then, yes, it wastes a lot of fabric.  But that’s how to do it because it’s so hard to work with triangles.  When you cut woven fabric (like cotton), it’s best to cut in the same direction as the threads are going (they are at right angles to each other).  That way the fabric holds its shape for the most part.  When you cut at an angle to those threads, you are cutting on what is called the bias.  The bias is notoriously stretchy.  In quilting, stretchy is bad because things get out of shape easily no longer line up.  So, it’s a tradeoff – wasteful or easier…  If you have to cut on the bias, heavily starch the fabric before cutting to help keep its shape.
4.    For me, picking out fabrics is the hardest part.  There are tons of books and classes on it but the amazing thing is I’ve never really seen a really bad quilt!!  It’s really a matter of taste and, if it looks good to you, go for it.  I’ve always been amazed when I listen to a professional quilter say “I bought this fabric and I just hated it, but, when I put it into this quilt, it gave the quilt just what it needed!”  It takes a lot of experience to get comfortable with color.
5.    I’m not exactly sure what you mean by cutting off corners of triangles before sewing, but, I wouldn’t do it because it may effect how things line up.
6.    I quilt with a (16 inch or something) hoop and my current project and is a queen size quilt.  I like to curl up in a comfortable chair in front of TV.  I’ve seen large frames used but I think it would be hard on my back – but I’m a lot older than you!!  What ever is most comfortable for you.
7.    Lining up corners.  To make life easy, you should press every seam after you’ve sewn it.  Most quilters press the 2 seam allowances to the same side towards the darker fabric.  When you line up 2 seams that should intersect, make sure the seam allowance on one goes to the left and the other to the right.  That reduces bulk but it also guarantees the lining up of the seams because the sewing machine itself will kind of smoosh them together.  If a lot of seams are coming together at one point, you can abandon the pressing of seams to one side and press the seam allowances open as you would in regular sewing.  

Well, that’s about it.  I would be happy to meet with you and wave my hands to make some of these things understandable!  I’ll be starting school on Sept. 1st so lunch wouldn’t work but I could meet you after work or on a weekend.  I think it’s a fabulous project and I know your Mom will LOVE it!!  I can’t wait to see it when it’s finished!!  Good luck!

Kathy O’Toole
(Brian’s wife!!)

I responded:


Kathy –

I love your comments!  The “hand-waving” stuff made me laugh…I know exactly what you mean.   

Let’s see…

The quilt is going to be sized to fit on a full-sized bed, but I suspect she’ll probably just keep it by the couch…the colors don’t really go with their house (they’re much more modern and fashionable than I am lol).  I’ll make sure to warn her about washing it…I’m sure she’ll know what to do though.  She’s good like that. 

As you can see in more recent posts, the hand is blue and the background (I’m calling it the “fill”) is going to be varying shades of green.  The more I look at it, the more it reminds me of a Monet painting…you kind of have to cross your eyes a little to see the picture for what it’s supposed to be.    I’m still debating what to do about those middle two fingers though…they don’t really stand out on their own.  I’m thinking about doing a little heart embroidery pattern just inside of each one, in a metallic blue thread.  Thoughts? 

I’ve been trying to cut out pieces in rows, then do them in chunks that make it easier to sew long strips together…not necessarily straight rows like most would do, but close to that.  There were a couple of exceptions on the hand that made putting them together interesting (see the failed corner attempt), but I think I managed to make it look ok.  Not great, but it works.  I’ll have to remember that next time I try to design something on my own…just because it looks clever on paper doesn’t mean it’ll look good on a quilt.   

The background you were looking at was a preliminary doodle.  I’ve since come up with a more final sketch, and though it doesn’t really lend itself to long lines, it’s better than it was I think. 

1.    Pinking (however you spell it) shears sound like a good idea…I’ll have to try that.
2.    Yeah, it’s always the seam allowance that throws me off on these things. And Brian told me you asked if I knew what a trapezoid was…you’d realize how silly that question is if you knew me (and my family) better lol.  My mom was a math major and I’m in grad school for Applied Math and Statistics MS’s.  Yeah, I know what a trapezoid is.  :-P 
3.    I’ve never even paid attention to which direction the threads were going…I hope that doesn’t come back to bite me. 
4.    I’ve been picking them out based on what patterns/colors catch my eye in the fat quarters section at Joann’s.  I really like that method because it’s given me a whole lot of different patterns of similar colors, for relatively cheap (and I don’t have to bug the poor cutting people by coming up there with 50 different rolls of material!).  the borders I just picked solid colors for.  I love that a solid half of most Joann’s stores are catered almost exclusively to quilters.  I really had no idea I’d enjoy this so much…it’s so soothing, and it’s really like putting a puzzle together (which, if you could see my house, you’d know I LOVE jigsaw puzzles).  I’m hooked!
5.    Yeah, I’ve just cut excess fabric off once I’ve sewn the pieces into place. 
6.    A hoop might work…I kind of like being able to see the whole picture though…I’m not really comfortable with my judgment on these things enough to just focus on one place without being able to see the whole thing (or a bigger part of it).  how do you mark your patterns though?  Like, when you’re going to quilt stuff, how do you mark where you need to stitch?  Do you lay it out before hand?  I vaguely remember my mom using her quilting rack to help her mark stuff…another reason I like the rack better for now. 
7.    I still haven’t tried this.  A lot of my seams seem to be coming together at once (6 or so pieces at one vertex), so it’s been sort of a mashup every time anyways. 

Brian offered to have me come over with my stuff and get your help on this in person…I told him I’d like to get the front finished first, but that after I’m done with that, I’m kind of lost for where to go next.  It’ll probably be a few weeks before I get it all in one piece, but if you don’t mind, I’d definitely like to get your help on it! 

Oh, the other thing…how do I pick batting?  This is a full-sized quilt, intended for her to curl up on the couch under, but she lives in Texas so it doesn’t need to be very thick at all.  I’ve read all kinds of stuff about wool, cotton, polyester, bamboo…but personally, for this kind of project (and my lack of experience), what would you pick? 

Thanks so much for all your help already! 

-Kat

Wednesday, September 2, 2009

Wrapping up the day...at 1 am

Here's the latest drawing for the fill/edges.  Ignore the middle, it was just to use colors.


Starting on the fill.  Got the pinky and middle two fingers sewn to the heart and the green.  The big triangle gave me some serious issues, but I got it eventually.  It ain't pretty (see previous post), but it works.  Better than the previous post, promise.  Marginally.
 
Testing out the embroidery pattern and color.  I need some stabilizer before I can do it on the actual quilt.  


This one's from yesterday...the official first green piece.  Grisgris was enthralled too.

 
As always, he's helpful.


I like how this is coming out.  It's sort of like a Monet quilt...you gotta kind of squint your eyes to see the pattern, but it's there.  :-P  If I get to name this quilting movement, it's going to be called Impressionist Quilting.

I picked up a template today to do some embroidering on the edging.  I'm not sure if I'll have time to get to that, but I figured I'd give myself the option if I wanted to.  It's just hearts...nothing fancy, but it's pretty anyways.

Class starts tomorrow, so a) I should get to bed and b) I might be less consistent with working on this.

Love you lots!  Can't wait til Christmas!!!

first fail

I can't get this corner right to save my life. it's after midnight, I'm giving up.